
Documentation Index

Fetch the complete documentation index at: https://narev.ai/docs/llms.txt

Use this file to discover all available pages before exploring further.

Start with usage-based billing so you can measure usage and bill customers correctly from day one. This guide walks you through connecting a Next.js app to Narev Cloud using the Narev SDK and sending billable AI events to Polar.
1

Get your API keys

To authenticate your app, you need API keys from both Narev Cloud and your billing provider.
  1. Create a free Narev Cloud account.
  2. Navigate to Settings → API Keys and generate a new NAREV_API_KEY.
  3. Get your billing provider credentials. If you are using Polar, create a sandbox workspace and generate a POLAR_ACCESS_TOKEN.
Add these credentials to your local environment variables:
.env.local
NAREV_API_KEY=your_narev_api_key_here
POLAR_ACCESS_TOKEN=your_polar_access_token_here
POLAR_SERVER=sandbox
This guide uses Polar because it has a concise setup flow. You can use the exact same framework pattern with Stripe, OpenMeter, Lago, or other supported destinations.
2

Install the packages

Install the core Narev SDK billing package, your preferred billing provider destination, and the Next.js UI components.
npm install @ai-billing/core @ai-billing/polar @ai-billing/nextjs ai @ai-sdk/openai
3

Configure your billing destination

Configure the destination that receives your billing events.Create a lib/destinations.ts file to configure Polar. The externalCustomerIdKey is critical because it tells Polar which Customer Tagging field maps the usage to a specific customer.
lib/destinations.ts
import { createPolarDestination } from '@ai-billing/polar';

export function getBillingDestinations() {
  const accessToken = process.env.POLAR_ACCESS_TOKEN;

  if (!accessToken) return [];

  return [
    createPolarDestination({
      accessToken,
      server: process.env.POLAR_SERVER === 'production' ? 'production' : 'sandbox',
      eventName: 'llm_usage',
      externalCustomerIdKey: 'userId',
    }),
  ];
}
4

Add the backend middleware

Use the wrapLanguageModel function from the Vercel AI SDK to attach the Narev billing middleware to your model. This wrapper automatically tracks token usage and sends it to your billing provider.Create a central helper for your billed models that uses your configured destinations.
lib/billing.ts
import { wrapLanguageModel } from 'ai';
import { openai } from '@ai-sdk/openai';
import { createOpenAIV3Middleware } from '@ai-billing/openai';
import { getBillingDestinations } from './destinations';

const billingMiddleware = createOpenAIV3Middleware({
  destinations: getBillingDestinations()
});

// Wrap your model to automatically meter all generations
export const billedModel = wrapLanguageModel({
  model: openai('gpt-4o'),
  middleware: billingMiddleware
});
Centralizing your model creation in one file ensures that every part of your app uses the metered instance, preventing unbilled usage leaks.
5

Use the model in your API route

Pass the wrapped model into Vercel’s streamText function. Use the providerOptions object to pass Customer Tagging metadata. The billing destination uses this data to know which customer to charge for the tokens consumed.
app/api/chat/route.ts
import { streamText } from 'ai';
import { billedModel } from '@/lib/billing';

export async function POST(req: Request) {
  const { messages } = await req.json();
  
  // Get the authenticated user ID (e.g., from your auth provider)
  const userId = 'user_123'; 
  
  const result = streamText({
    model: billedModel,
    messages,
    providerOptions: {
      // These tags are automatically forwarded to your billing destination
      'ai-billing-tags': {
        userId: userId,
        // You can add additional metadata here for deeper cost attribution
        feature: 'chat-interface'
      },
    },
  });

  return result.toDataStreamResponse();
}
Always verify that userId correctly maps to the corresponding customer record in your billing provider. Start in a sandbox environment before deploying to production.
6

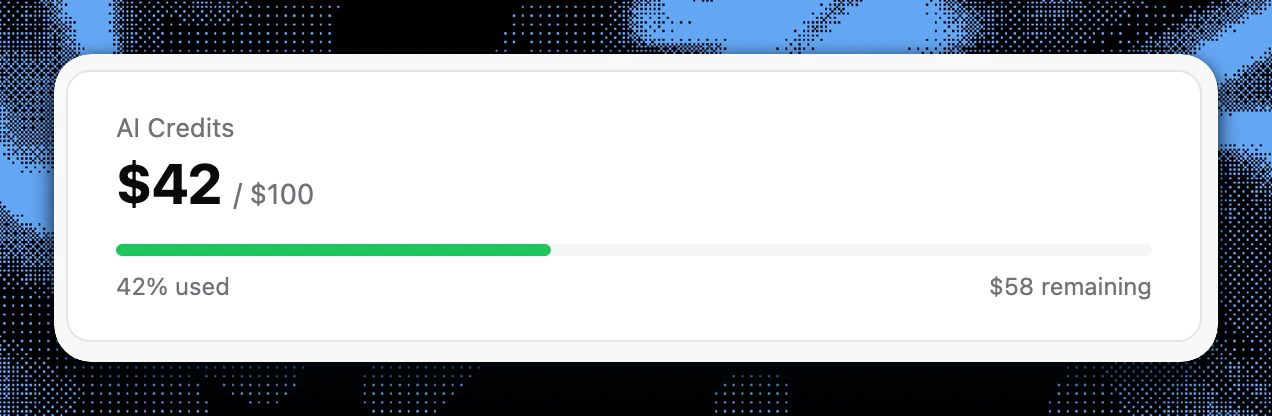
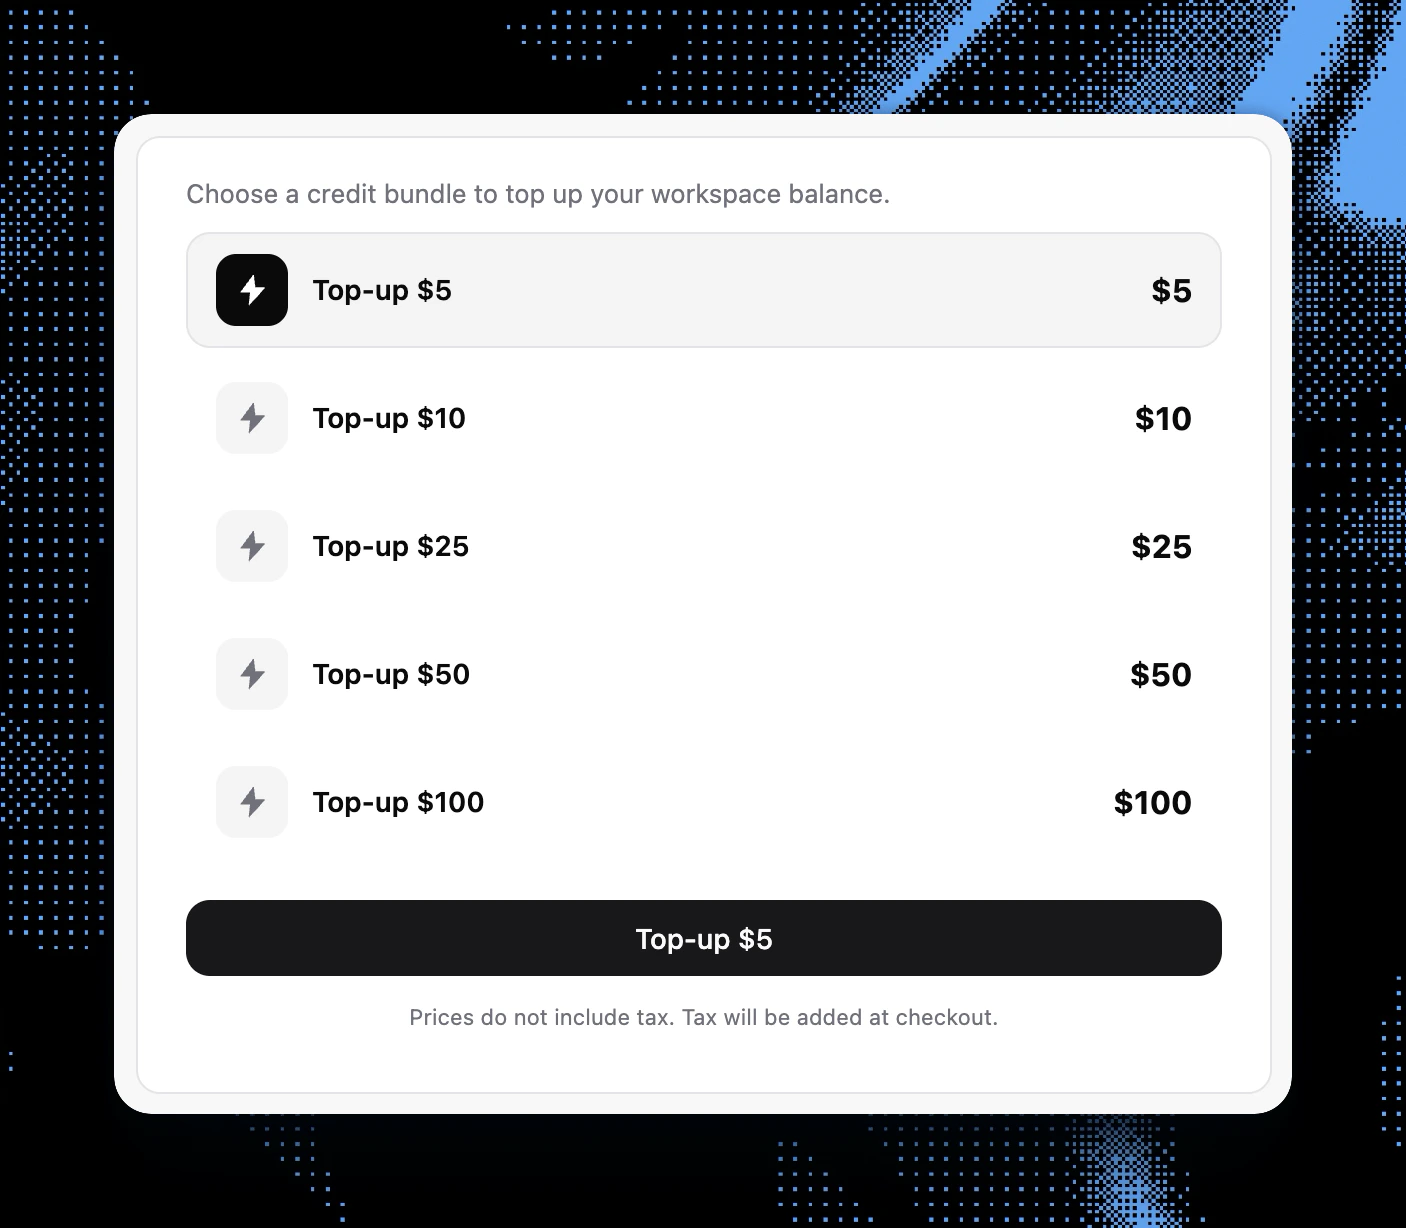
Add the pre-built billing components

Embed the pre-built React components in your Next.js frontend to show users their real-time usage and provide a native checkout experience for buying credits.
app/components/usage-dashboard.tsx
import { CreditUsagePolar, CreditTopUpPolar } from '@ai-billing/nextjs';

export default function BillingDashboard({ userId }: { userId: string }) {
  return (
    <div className="flex flex-col gap-6 p-6 bg-white dark:bg-zinc-950 rounded-xl border border-zinc-200 dark:border-zinc-800">
      <h2 className="text-xl font-semibold text-zinc-900 dark:text-zinc-100">
        Usage & Billing
      </h2>
      
      {/* Shows current consumption and remaining budget/credits */}
      <div className="p-4 bg-zinc-50 dark:bg-zinc-900 rounded-lg">
        <CreditUsagePolar userId={userId} />
      </div>
      
      {/* Renders a checkout component to buy more credits */}
      <div className="p-4 bg-zinc-50 dark:bg-zinc-900 rounded-lg">
        <CreditTopUpPolar userId={userId} />
      </div>
    </div>
  );
}
7

Voila! You're ready to bill

Your app is now fully equipped with AI monetization, cost tracking, and a self-serve top-up dashboard.
Billing dashboard using Narev pre-built components showing real-time usage
Billing dashboard using Narev pre-built components showing top-up options
You have successfully integrated the Narev SDK into your Next.js app.

Choose your next guide

Next.js billing integration

Build the full framework integration with reusable helpers and coverage checks.

Polar billing platform integration

Configure Polar customers, event names, and usage mapping for metered billing.

Narev SDK overview

Learn how provider middleware, price resolvers, and destinations work together.

Benchmarking quickstart

Compare model quality and cost before changing production routing.